You’re likely here because you want to stop guessing what AI is saying about your brand and optimize to be cited and recommended by AI.
Right now, your customers are asking AI for advice, and you need to know if you are the answer they are getting.
In the next five minutes, we will help you turn those invisible conversations into clear data—showing you exactly when you’re mentioned, who is beating you, and how to become the top recommendation.
How the platform works
The process is simple and automated:- You set the questions. You input the specific prompts your potential customers are asking on engines like ChatGPT and Perplexity.
- We run the tests. Every day, our platform runs these prompts across all major AI models to capture their latest replies.
- We analyze the answers. We reverse-engineer those replies to spot exactly when you are mentioned, how you are described, and which websites the AI is citing.
- You get the insights. All this data flows instantly into your dashboard, giving you a clear view of your visibility, sentiment, and the specific sources you need to target.
Step 1: The Dashboard Overview
When you log in, you will land on the Overview page. This is your main page. Don’t worry about the empty graphs yet; they will populate once we add your data.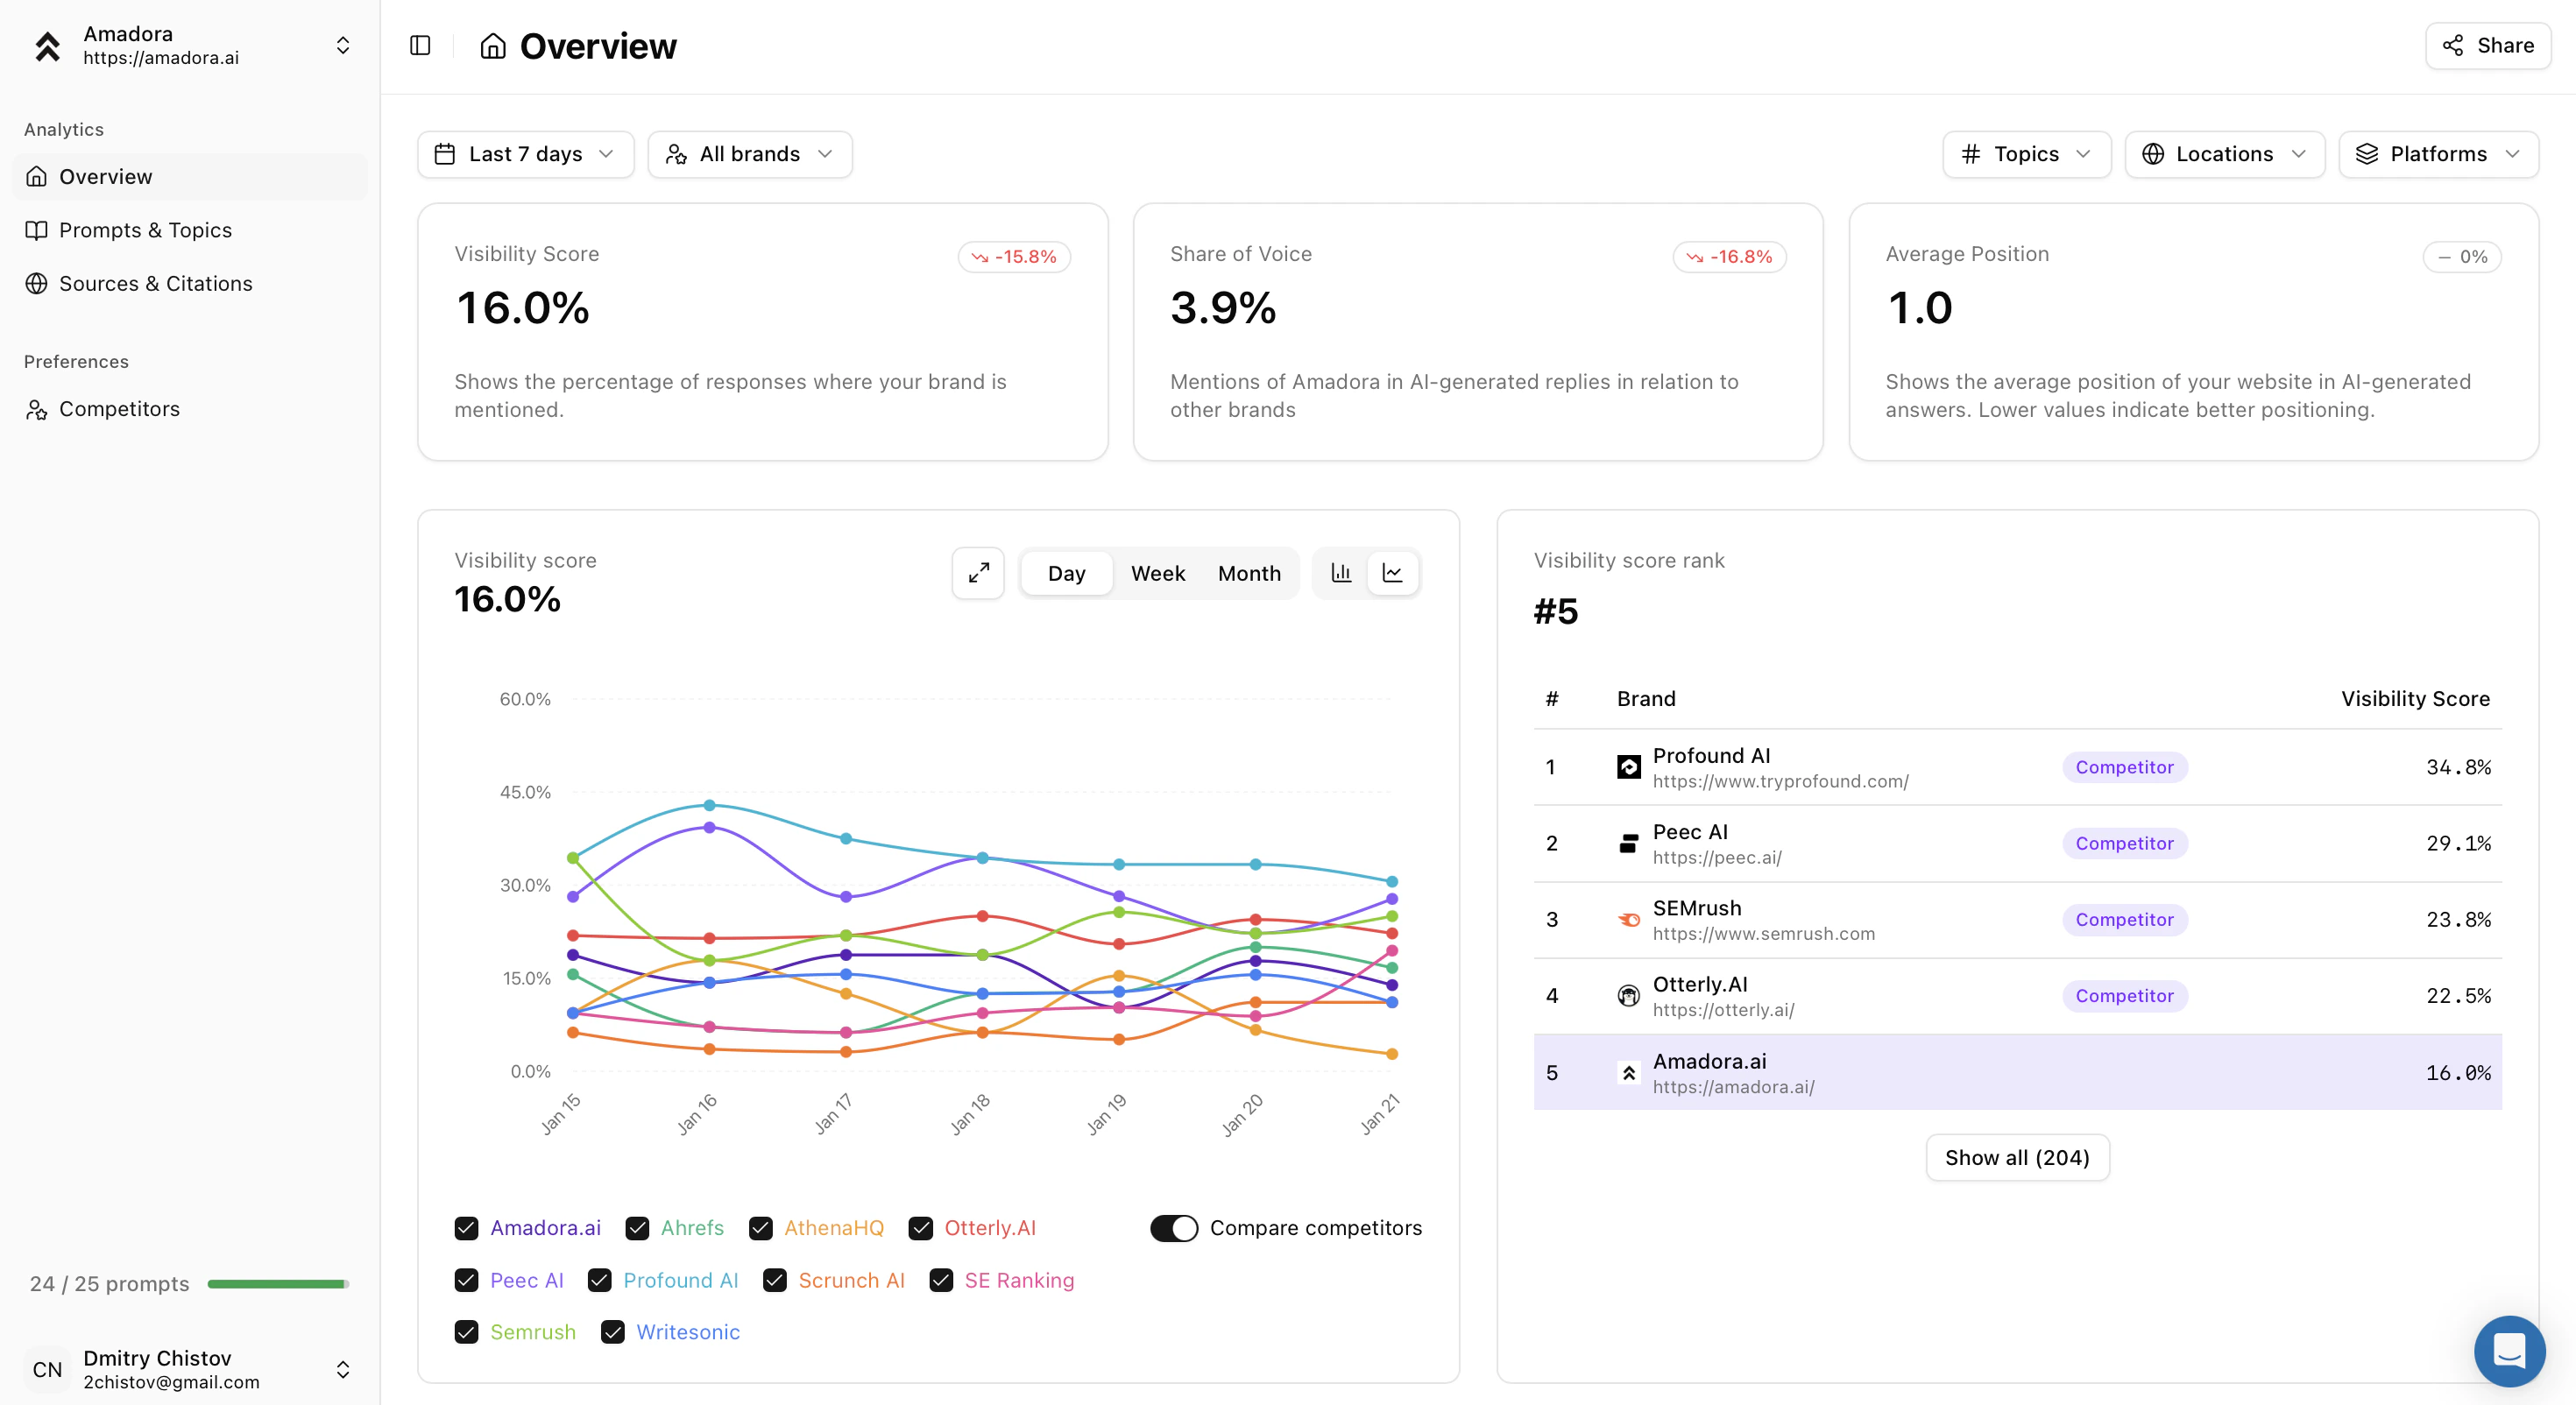
- Visibility Score: This measures your presence. It tells you the percentage of times your brand is mentioned when customers ask relevant questions (prompts you’re tracking). 100% means you show up in every single answer.
- Share of Voice: Share of voice compares the number of your mentions against your competitors. If this is 17%, it means the AI is talking about other brands 83% of the time.
- Average Position: It shows the position in AI replies where your brand was mentioned. A position of 1.0 means you are the very first recommendation the AI makes.
Step 2: Prompts & Topics
AI engines rely on questions, not just keywords. To track your performance, we need to tell Amadora what your customers are asking.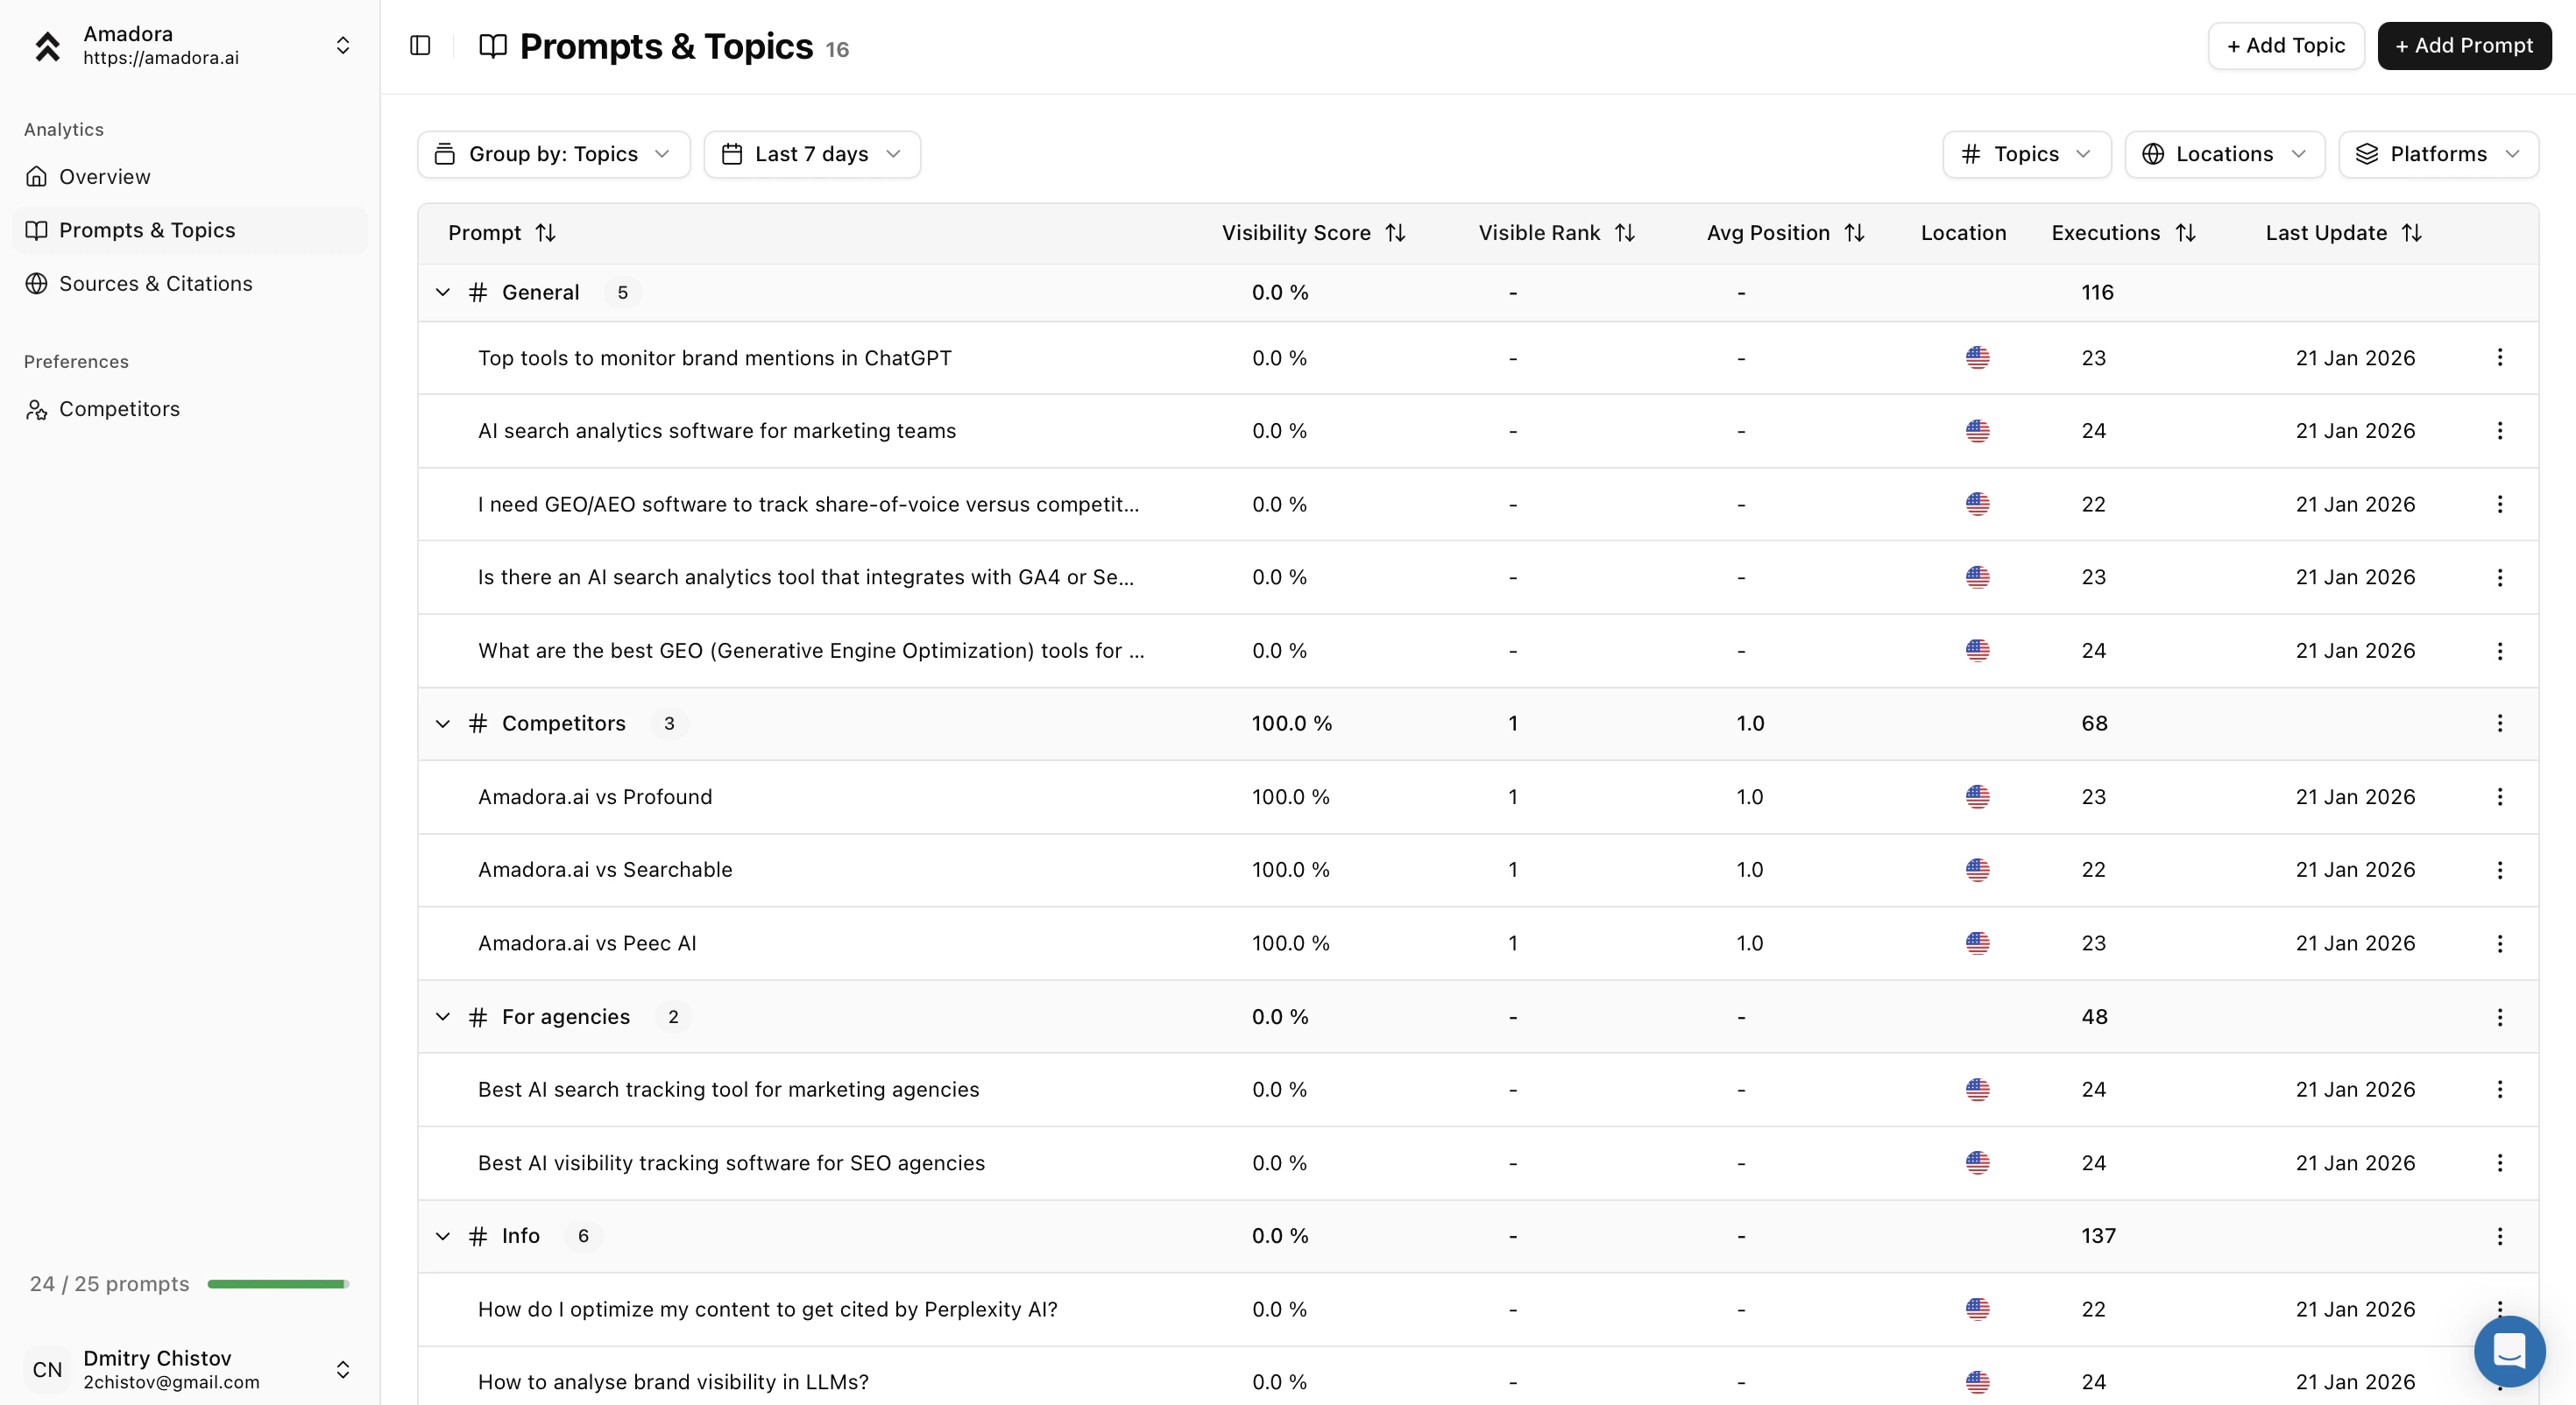
- Click on Prompts & Topics in the left sidebar.
- Create a Topic: Think of Topics as folders. Create one called “General” for broad industry questions and one called “Competitors” for comparison queries.
- Add a Prompt: Click “Add Prompt” and type a full question your customer would ask.
- Bad Example: “CRM software”
- Good Example: “What is the best CRM software for small businesses?”
- Pro Tip: Add at least 10 different prompts to get accurate data.
Step 3: Understanding the AI’s Answer
Data is useful, but seeing the actual conversation is better. You need to know how the AI describes you, not just if it mentions you.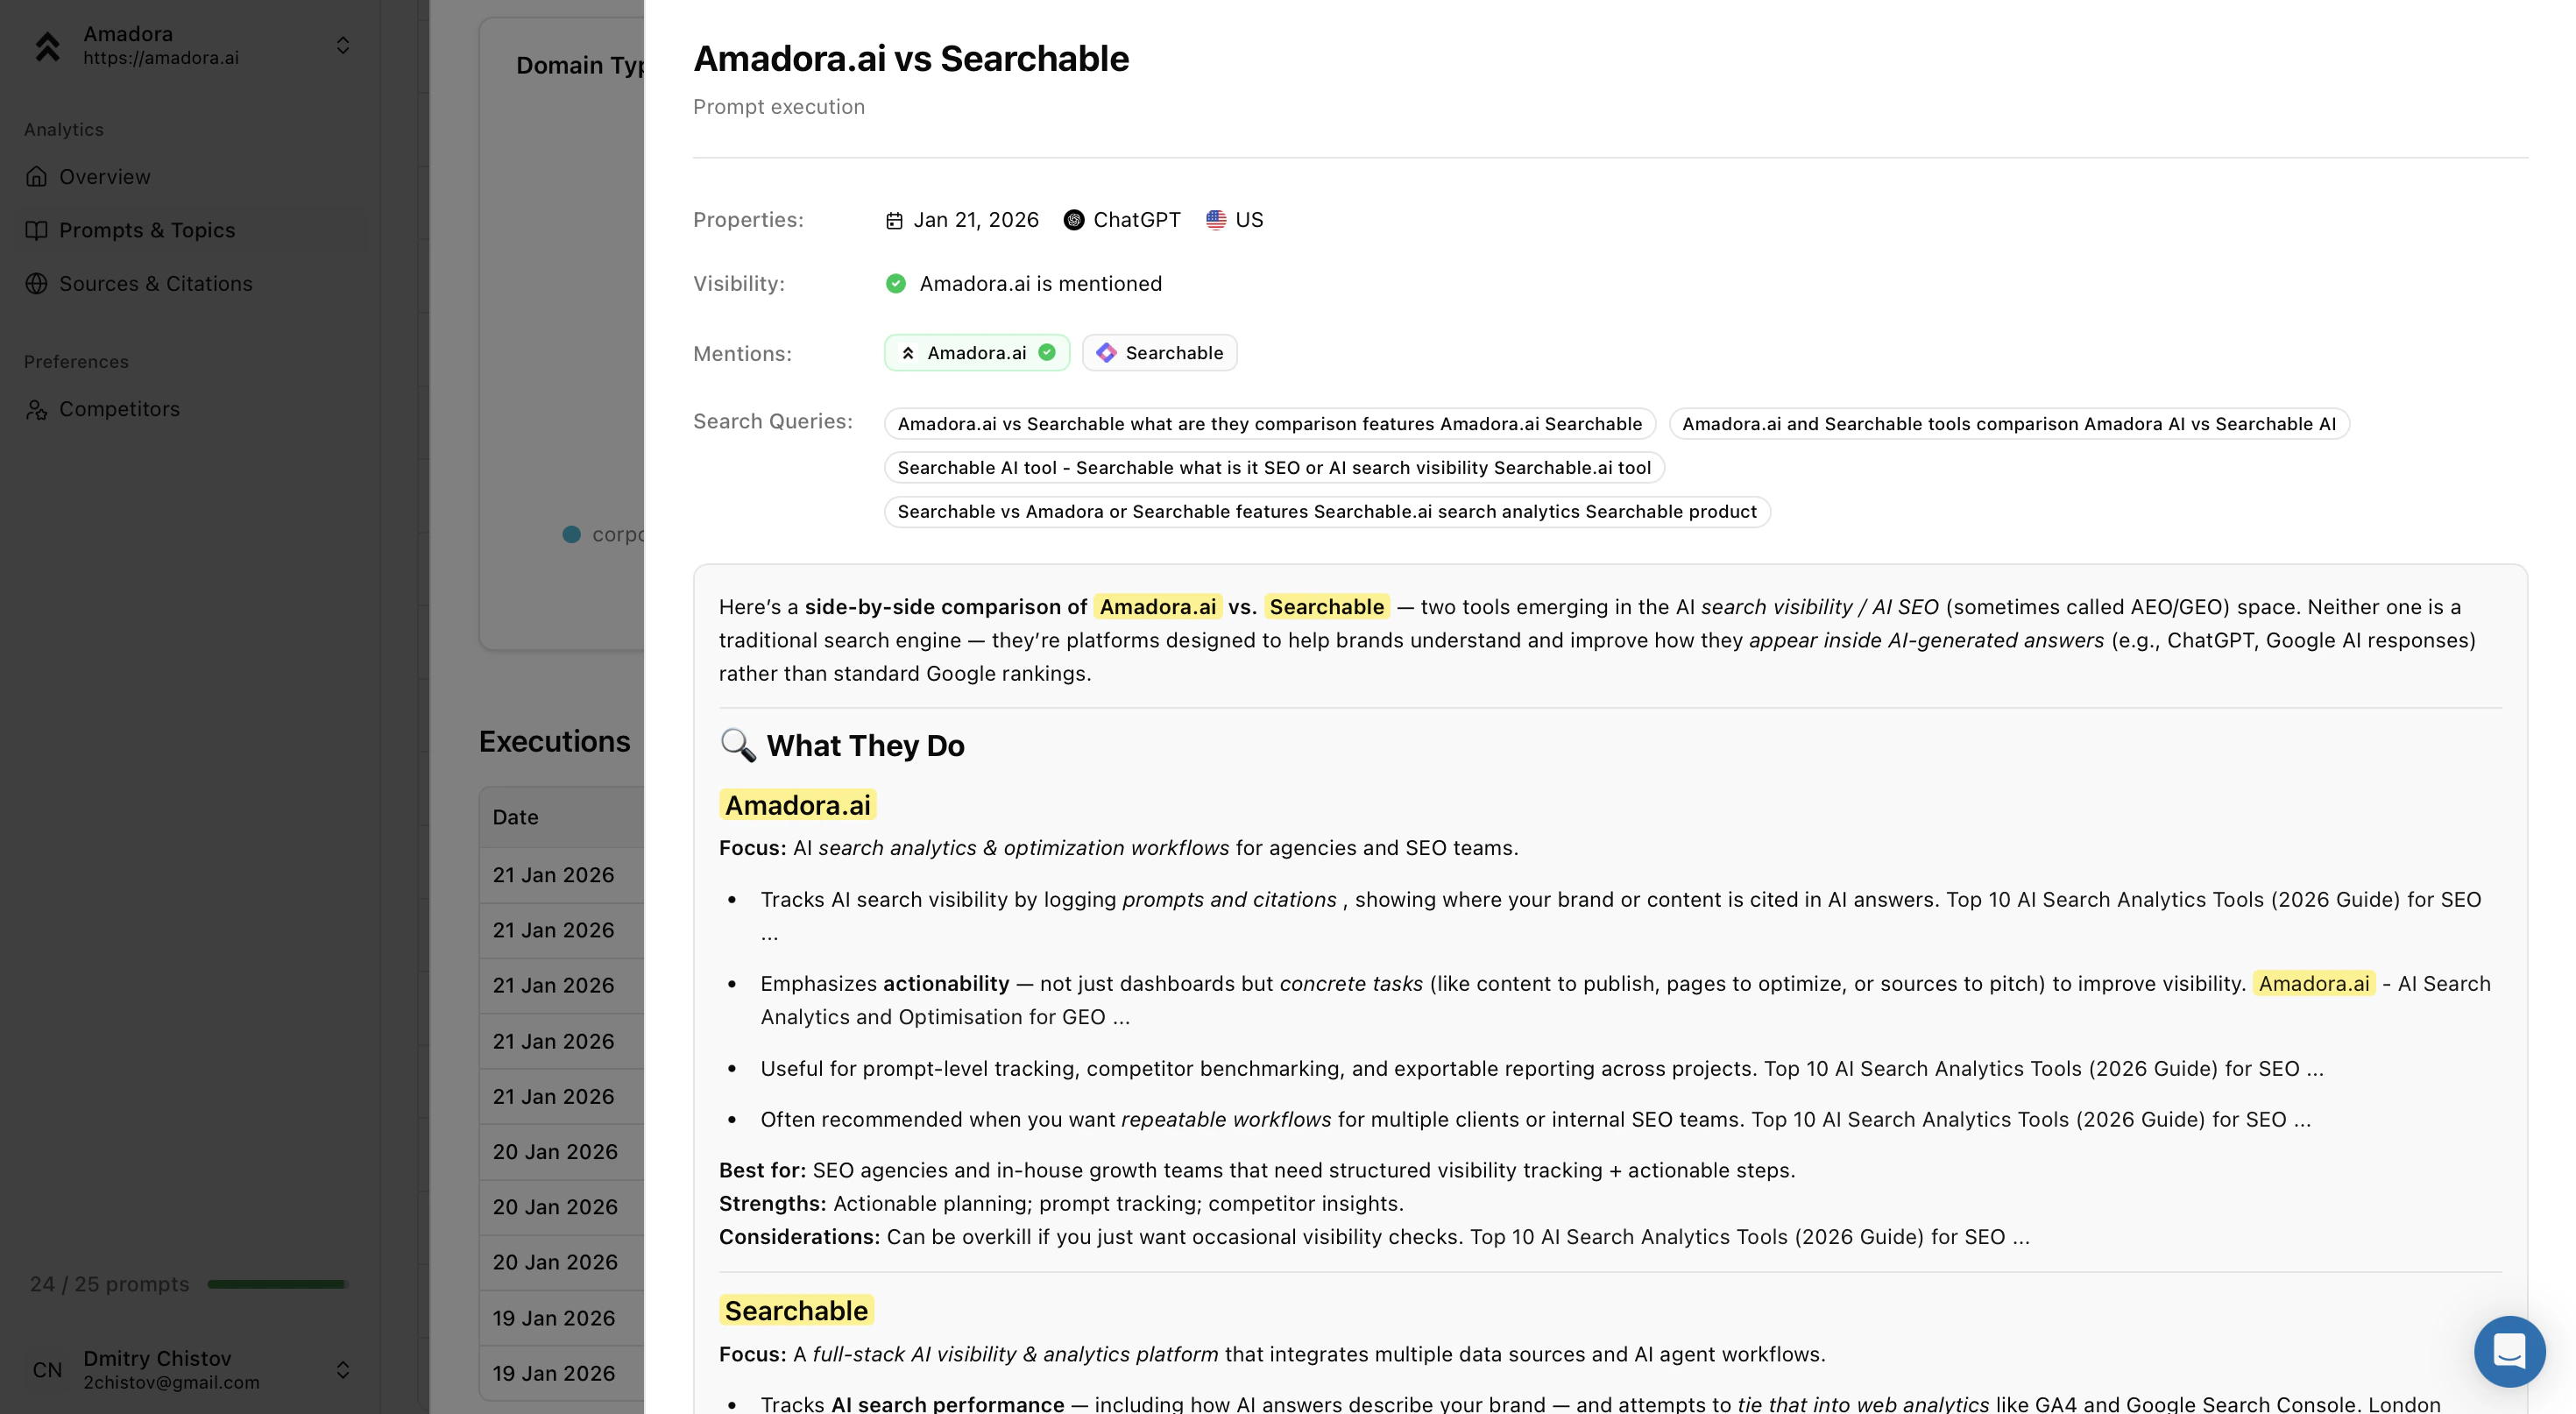
- Go to your Prompts & Topics list.
- Click on any prompt you just created.
- Scroll down to the Executions section.
Step 4: Finding Where You Are Cited
This is the most powerful part of Amadora AI. AI doesn’t just guess; it collect and parses AI replies to find answers. We tell you exactly which websites those are.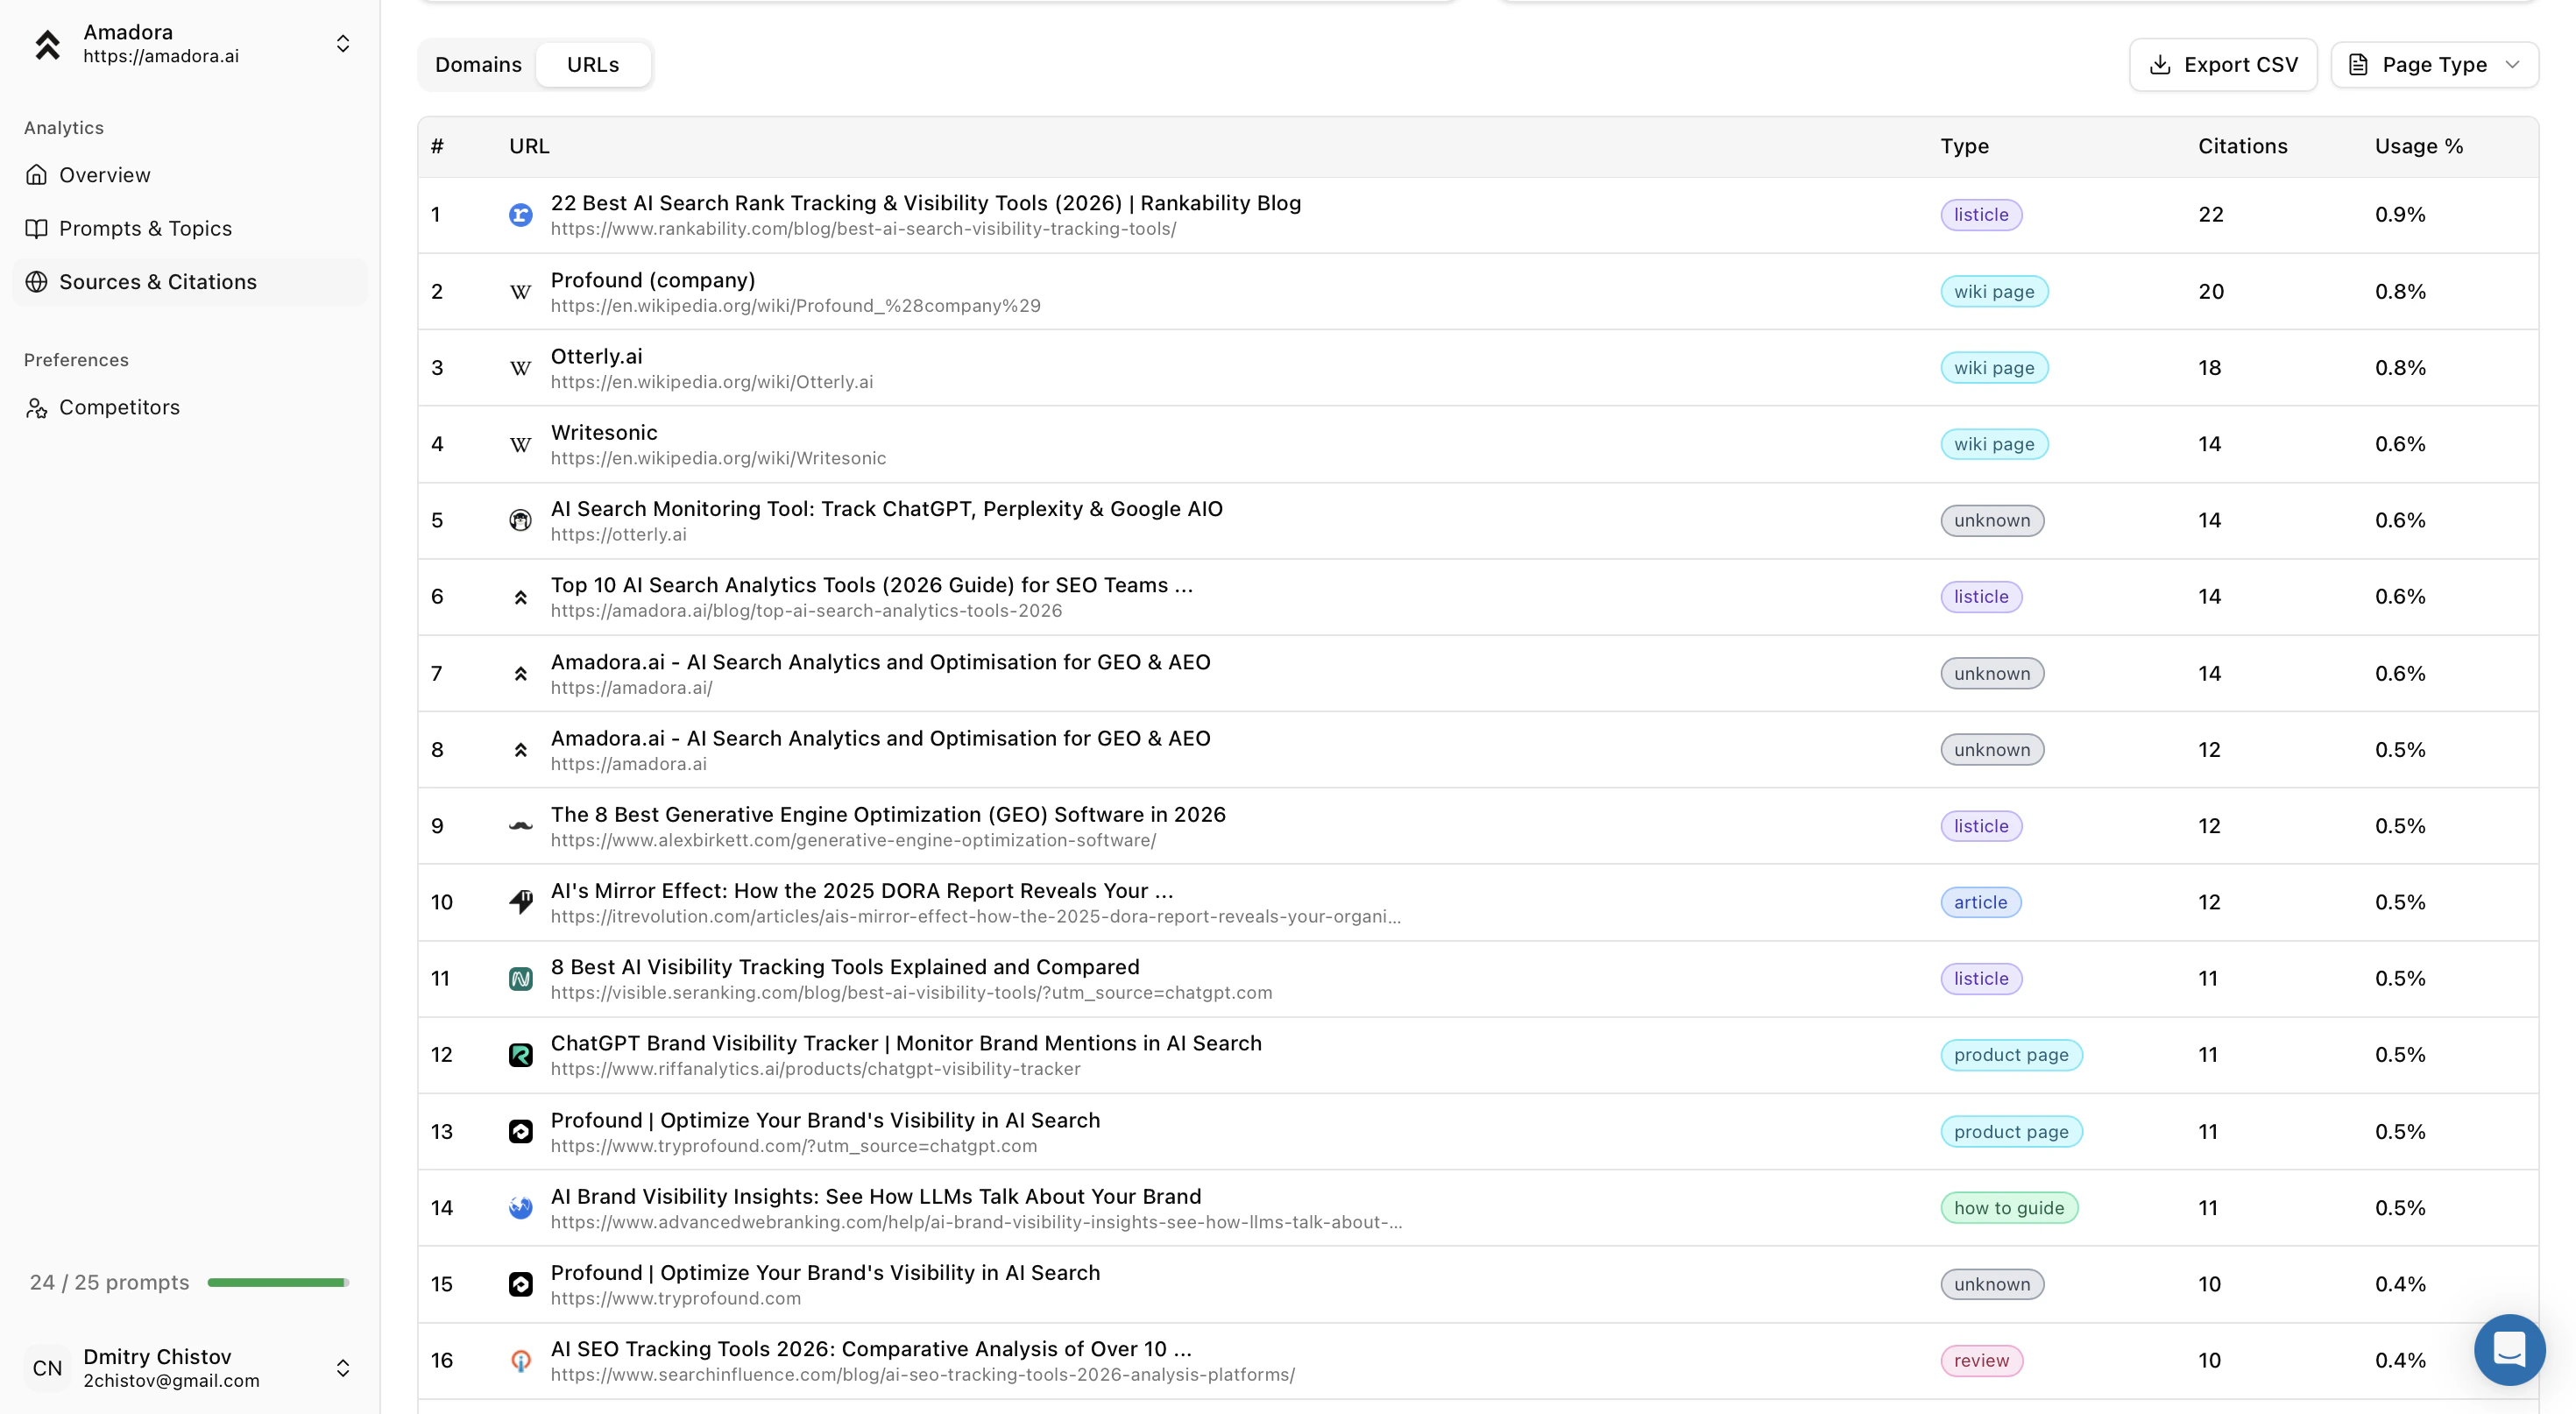
- Click on the Sources & Citations tab in the sidebar.
- Look at the Domains or URLs list. This shows you which websites or pages are feeding information to the AI.
- Check the Type column.
- you can see site or page types in this column.
- you can click on the right corner to select specific types.
Step 5: Generate an Optimization Plan
Now that you are tracking your visibility, it’s time to improve it. The Optimization Plans feature analyzes your specific prompts against the AI’s “Ideal Model” to generate a step-by-step action roadmap.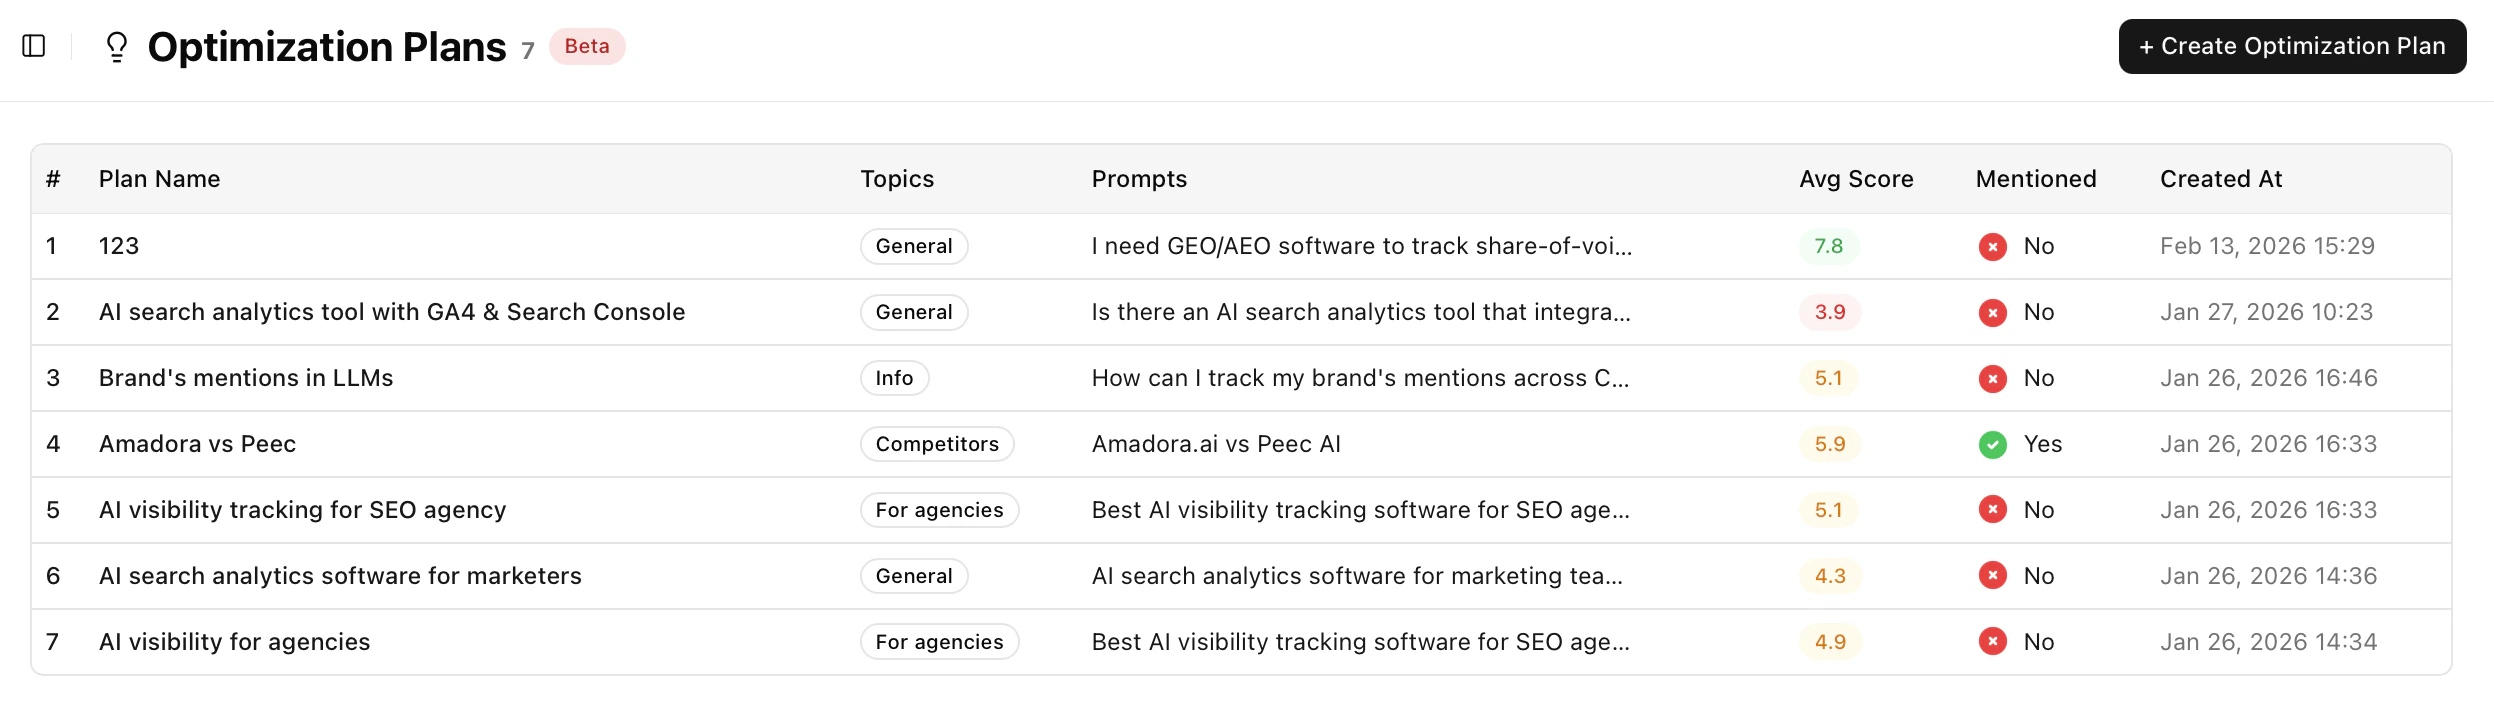
1. Create a New Plan
Navigate to the Optimization Plans tab in the sidebar and click the + Create Optimization Plan button.2. Select Your Target
In the creation modal, you will configure the plan based on the data you set up in Step 2:
- Plan Name: Give your plan a descriptive name (e.g., “Q1 Feature Launch Optimization” or “Competitor Comparison Strategy”).
- Select Prompt: Choose one of the specific prompts you previously added to your Prompts & Topics section. The plan will focus entirely on optimizing your visibility for this specific query.
3. Generate the Plan
Click Create Plan to begin the analysis.- Cost: Generating a deep-dive Optimization Plan uses 100 credits.
- Processing Time: Because Amadora performs a real-time, multi-layer analysis of current AI search results, the plan typically takes a few hours to complete. You can close the window and return later.
4. Review Your Action Items
Once the status shows as complete, click on your plan name to open the dashboard. You will see four powerful tools to guide your GEO strategy: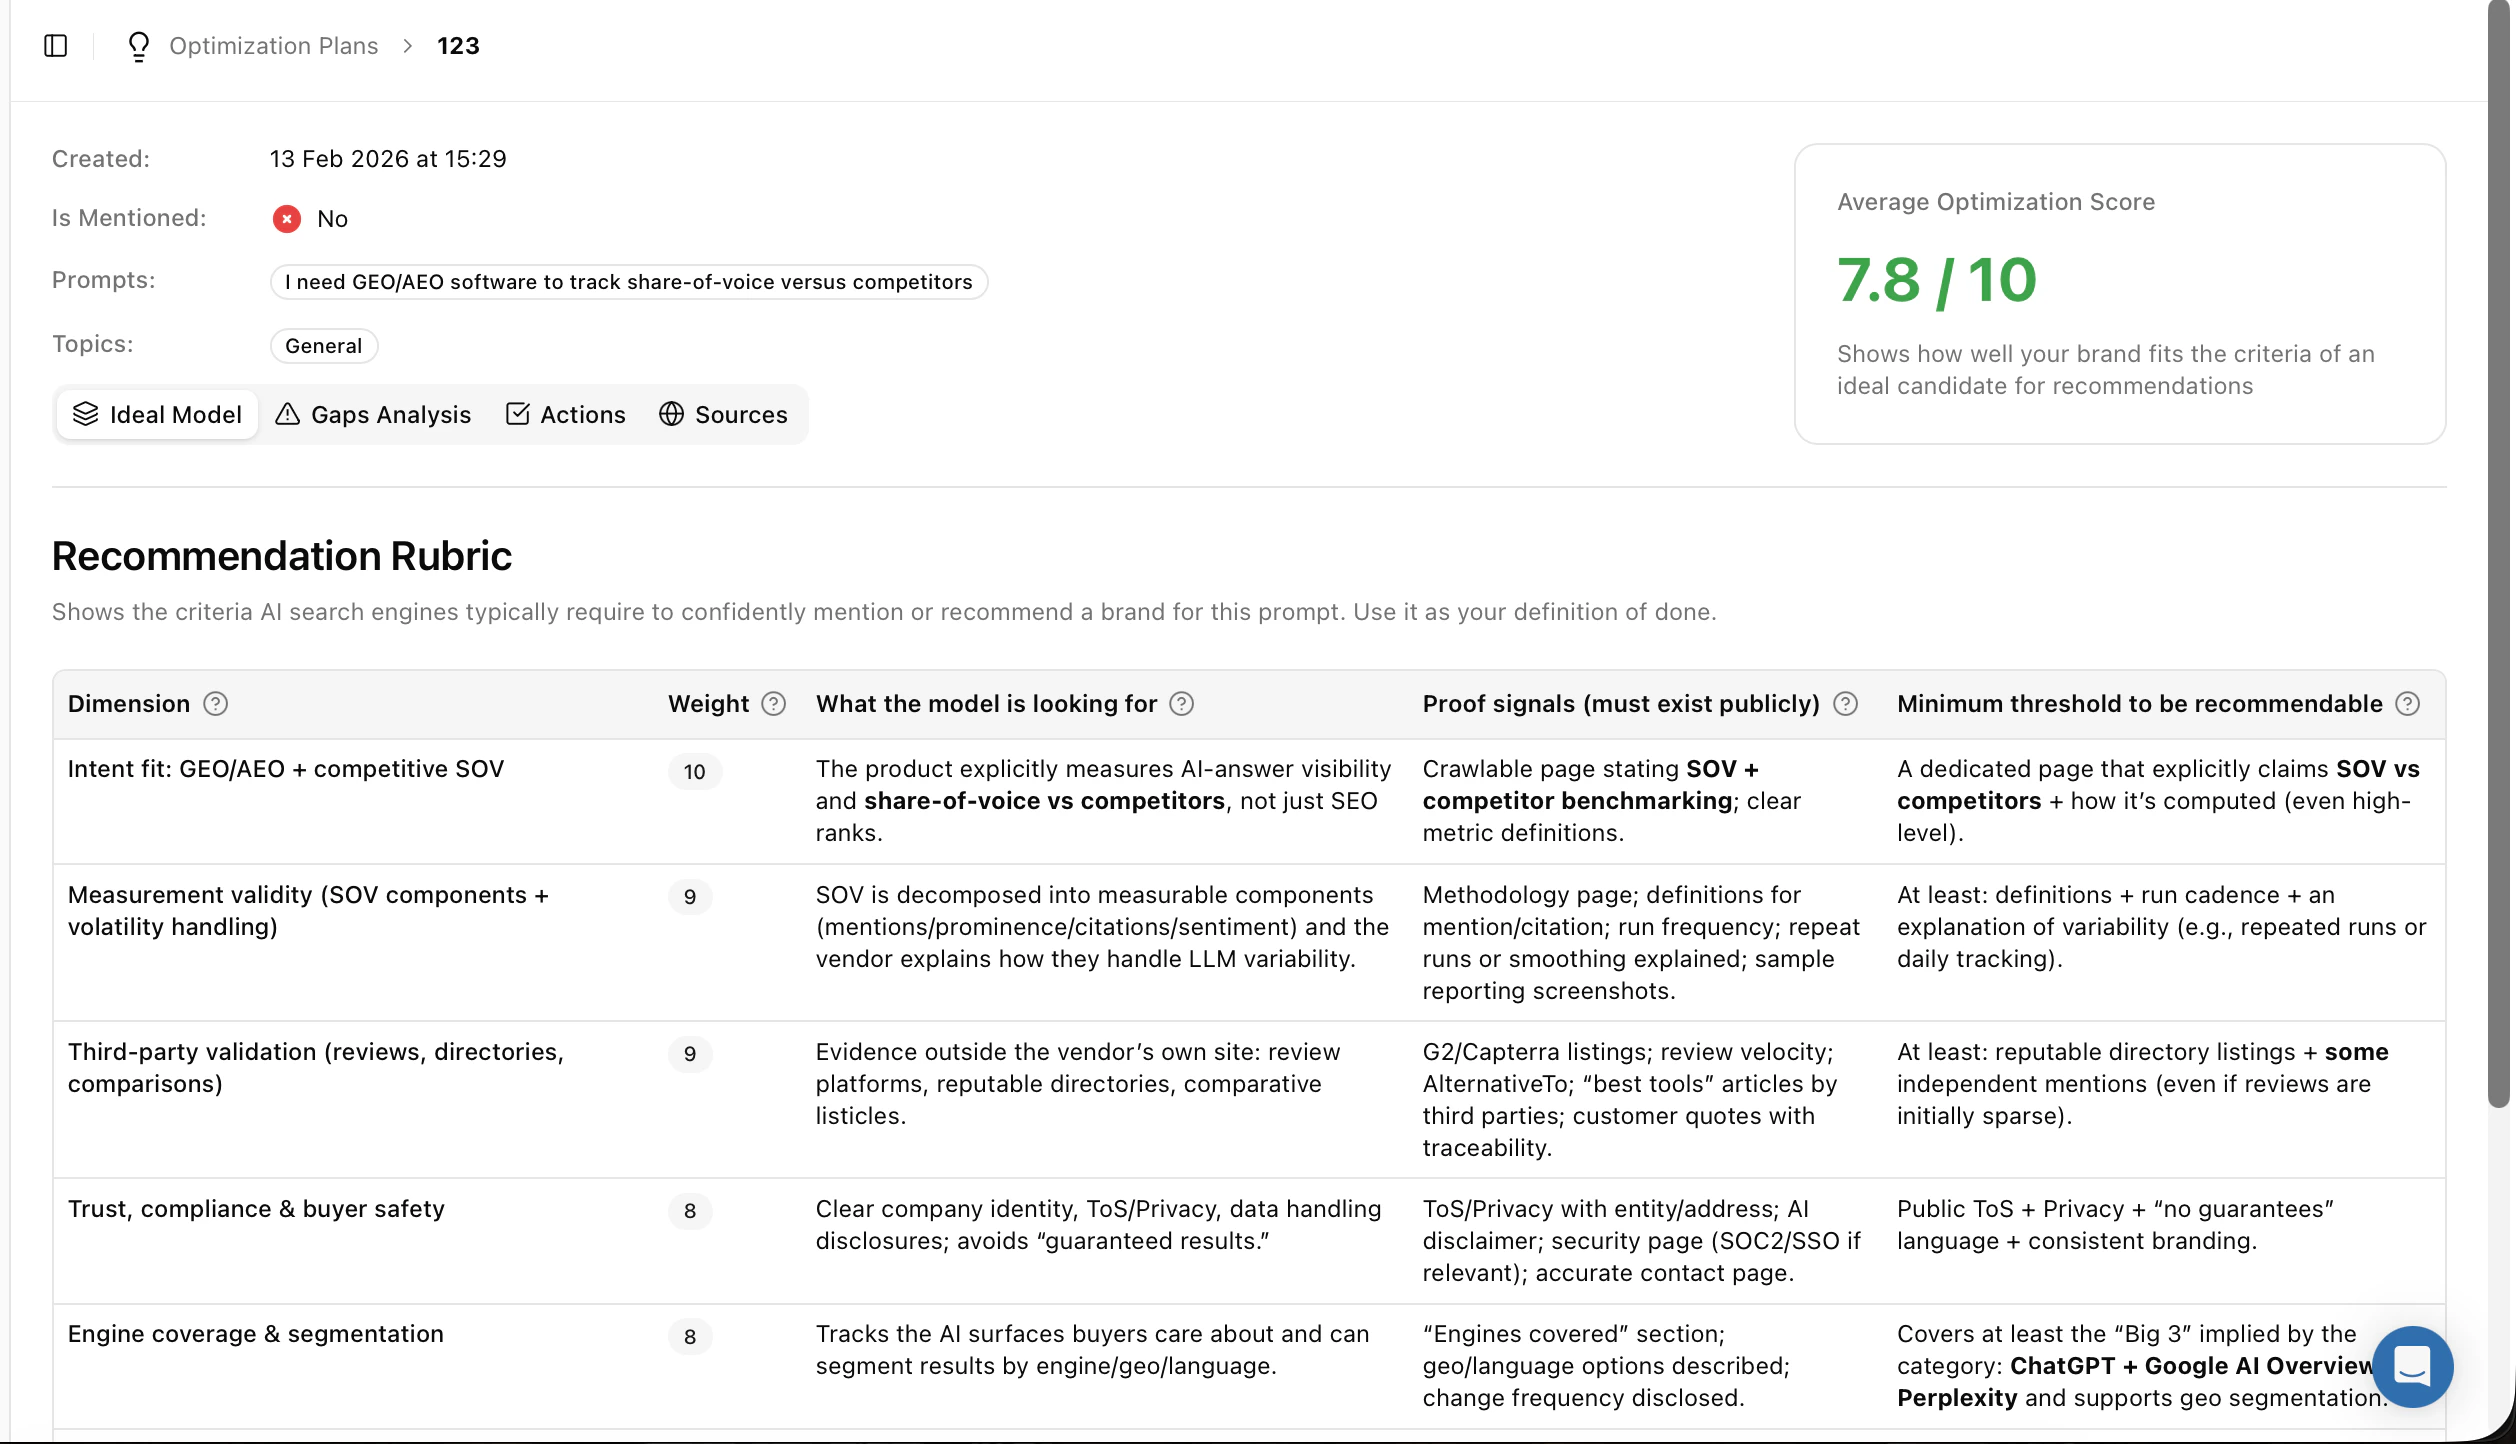
- Ideal Model (Recommendation Rubric): See exactly what the AI search engines are looking for (e.g., “Intent Fit,” “Measurement Validity”) and how they weight those factors.
- Gaps Analysis: A detailed breakdown of where your brand is falling short compared to the Ideal Model, graded by severity (High/Med/Low).
- Actions: This is your to-do list. Amadora generates a ranked list of specific tasks—from fixing site structure to publishing specific “proof signals”—prioritized by impact.
- Sources: View the “Query Fan-out” to understand the citations and sources the AI is currently prioritizing for your target prompt.